User Guide
Welcome to the OurGroceries app!
With OurGroceries you can keep track of your shopping lists and keep those lists instantly synchronized on all the phones and tablets in your household. You can also access those lists on your Amazon Alexa device, Siri, your computer, your Apple Watch, and your Wear OS watch.
This user guide explains how OurGroceries works, so you can get the most out of it.
Table of contents
Basic features
- Overview
- Installing
- Basic use
- Adding items
- Crossing items off
- Editing item information
- Sharing all your lists (setting up an account)
- Using recipes
- Creating lists and recipes
- Deleting lists and recipes
- Renaming lists and recipes
- Removing ads
Advanced features
- Categories
- Changing item order
- List notes
- Photos
- Adding items with your camera
- Barcode scanning
- Sharing a single list
- Printing
- Android shortcuts
- iOS Shortcuts
- iOS Home Screen quick actions
- Widgets
- Website
- Amazon Alexa (Echo, Dot, etc.)
- Voice commands on Android and Wear OS
- Siri
- Apple Watch
- Wear OS
- Mac Apple Silicon app
- Importing data
- Exporting data
- AI integration (MCP server)
Settings
- Settings
- Remove ads
- About OurGroceries
- Share your lists
- Sign in / Switch accounts
- Item categories
- Sort list of lists
- Lock orientation to vertical
- Themes
- Sort shopping list items
- Arrange, sort, and group crossed-off items
- Cross-off action
- Show keyboard
- Arrange, sort, and group master list
- Add multiple items
- Say scanned items
- When adding an item with no category
- Capitalize items
- Show other suggestions
- Extend screen timeout
- List row size
Basic features
Overview
OurGroceries is a mobile app that you can install on your iOS device (iPhone or iPad) or Android device. It can keep track of multiple shopping lists and recipes.
You can set up “List sharing”, which means that if someone else in your household also installs the OurGroceries app, you’ll both see the same set of lists, and any change made to a list by either person will be seen by the other instantly. You can share with as many people as you want. Learn more
The OurGroceries app shows ads, but you can upgrade to get rid of the ads. Upgrading will also get rid of the ads for everyone you are sharing your lists with. Learn more
You can also use our website to see and modify your shopping lists from a computer. Learn more
If you have an Amazon Alexa device, such as an Amazon Echo, then you can set it up to know about your lists too, so that you can add items using your voice. Learn more
Similarly, if you have a phone with Google Assistant, you can also use it to add items using your voice. Learn more
Finally, if you have an Apple Watch or Wear OS watch, you can see your lists there too, which is convenient when shopping. Learn more about our Apple Watch or Wear OS apps.
Installing
You can install OurGroceries from the app store on your phone or tablet.
On iPhone or iPad, you can find OurGroceries in the App Store. Launch the App Store app and search for “OurGroceries”. You can also tap on this button if you’re browsing this page on your phone:

On Android, you can find OurGroceries on the Play Store. Launch the Play Store app and search for “OurGroceries”. You can also tap on this button:

If you wish to receive early testing versions of OurGroceries for Android, you may join the testing program. You can leave the testing program at any time.
There is also a web version of OurGroceries, so that you can see and edit your lists from your PC or from a phone for which we don’t have an app. Learn more
We have an OurGroceries skill that you can install on your Amazon Alexa device, such as the Amazon Echo. Learn more
Basic use
When you first launch OurGroceries, you’ll see a list of your shopping lists and recipes. Tap a shopping list to see its items.
Each shopping list contains the items that you want to buy on your next trip to the store. This is like making a list on paper. As you are shopping and putting an item into your cart, tap the item in the shopping list in OurGroceries. This will cause it to be crossed off, just like you would do with a paper list. The item will also move to the bottom of your list so that it’s not in your way.
Most people create one shopping list per store that they visit, such as one for “Safeway” and one for “Wal-Mart”. You can also create lists that aren’t store-related, such as a list of wines you want to buy (anywhere). And in fact some people create lists that aren’t shopping-related at all, such as a list of things to bring camping, questions to ask the pediatrician, to-do lists, etc.
You can also create recipes. A recipe is a list of items and some notes about the recipe (such as where you found it, or instructions for how to make the dish). Once you’ve made a recipe, you can tap the item names to add them to your shopping list. In fact you can add the entire recipe at once to your shopping list. Learn more
Adding items
Here’s how to add items to a list:
- On iPhone: While looking at a shopping list or recipe, tap the “Add an item...” line at the bottom of the list of items. Alternatively, you can tap the at the bottom-right of the screen.
- On Android: While looking at a shopping list or recipe, tap the “Add an item...” line at the bottom of the list of items. Alternatively, you can tap the floating button in the lower-right of the screen.
- On the website: While looking at a shopping list or recipe, click the “Add an item...” line at the bottom of the list of items. Alternatively, you can click the button at the top-right of the list.
This will bring up the “Add an item” screen. On this screen you can type an item name using the keyboard, for example, “peanut butter”. You can then tap the “Add” button to add the item to your list.
We remember all the items you’ve ever entered and display them on this screen, so you can also just tap the item name. (We call this list the “master list”.)
To make it easier to find items in the long list, just type the first letter or two of the item you’re looking for and the list will shorten to include only items that start with those letters. This also works with multiple words. For example, you can type “pe bu” to find “peanut butter”. Or you can type “cookie” to list all the cookies in your master list. You can add “ch” to that (making it “cookie ch”) to narrow the list down to just “chocolate chip cookies”.
If you find an item on this list that you no longer want listed there, tap the at the right of the item name to delete it.
There are various settings to configure how this screen works:
- Show keyboard
- Arrange, sort, and group master list
- Add multiple items
- When adding an item with no category
- Capitalize items
- Show other suggestions
Another way to add an item to your list is to uncross it off. See the next section of this guide for details, but essentially you can keep items crossed off between shopping trips and tap them to add them back to your list.
Crossing items off
While shopping you’ll want to cross items off your list as you add them to your cart. Cross items off by tapping them. This marks them with a horizontal cross-off line and moves them to the bottom of the list, below the “Add an item...” row. You can tap them there to un-cross them off and bring them back to the top of the list.
If you find that you cross off items by accident while shopping, you can configure OurGroceries to require a long tap or a swipe to cross items off. Learn more
You can also configure how the crossed-off section is ordered. You can choose from alphabetical, recently crossed-off at top, recently crossed-off at bottom, common items first, or by drag-and-drop. Keeping recently crossed-off items at the top is useful so that if you accidentally cross off an item, you can find it easily at the top of the crossed-off section. Learn more
You can delete all items in your crossed-off section by tapping the “Delete all crossed-off items...” button at the bottom of the list. This will remove all crossed-off items from that shopping list. It won’t remove them from other shopping lists or recipes, or remove them from your item history (the list you see when you tap “Add an item...”).
Editing item information
If you want more information about an item, tap the to the right of the item name. This will bring you to a screen where you can see and change various things about an item.
To change the item name, tap into the box where the name is displayed and edit the text.
To change the quantity of an item, tap the “Less” or “More” buttons. This will decrease or increase the count in parentheses after the item name. For example, if the item is “Potatoes”, tapping “More” will change the item name to “Potatoes (2)”. There’s nothing special about these parentheses and this number—they’re just part of the name like the rest of it. You can tap in the text box and edit the number directly, too.
You can categorize items by tapping the “Category” button and choosing a category. Learn more about how to use categories.
You can tap the barcode icon to scan a product’s barcode. Learn more about how to use barcode scanning.
For items in shopping lists, you can move them to a different shopping list by tapping the “Shopping List” button and selecting a different list. There’s currently no way to copy the item to a different list (and leave the item also in this list).
For items in recipes, you can change the target shopping list this item is added to when it is tapped. Learn more about recipes
Use the “Note” box to enter a note for the item. The note will appear in the shopping list just below the item name, and it’ll be remembered in case you want to use the same note again next time you add the item. You might use notes to record which brand or flavor you prefer, which size or type you need, whether something is on sale, what price it should be, when you need it by, or who it’s for—anything you like.
To delete the item, tap the trash can. This removes the item completely from this list.
You can star an item by tapping the star button. There’s nothing special about the star—what it means is entirely up to you. For example, a star might indicate that you have a coupon for this item, or that this item is urgently needed, or that a particular person is responsible for buying this item. Tap the star again to un-star the item. Items that are starred will show a star next to their name in the shopping list itself.
Finally, you can take a photo of the item, to ensure that your partner gets exactly the item you want. Learn more about how to use photos.
Sharing all your lists (setting up an account)
The app is called “Our” Groceries because it solves the problem of a household needing to keep track of what needs to be purchased at the grocery store. Anyone in the household can add items to any list, and the next person to shop will automatically see what was added.
For this to work, everyone in the household must connect their OurGroceries app to the same OurGroceries account. Note that this account is not related to your Apple or Google account. This is a separate account that you have with us.
To create an account: Run the OurGroceries app, go to its Settings screen, choose “Sign In”, and enter the email address you wish to use for your new OurGroceries account. On the next screen, pick a password for your new account.
Once you’ve created an account, there are two ways to share your lists with someone else:
- Invite them to your account: You (the account holder) should launch the OurGroceries app, go to its Settings screen, choose “Share Your Lists”, and send the invitation to the person you wish to invite to your account. They can use this invitation to automatically sign in to your OurGroceries account and share all of your lists.
- Ask them to sign in to your account: You should instruct the other person to install the OurGroceries app. They should then launch it, go to its Settings screen, choose “Sign In”, and enter the email address and password you used above when creating the account.
Generally the first option is easier because the other person does not have to type in your email address and password. The process will also have them install the OurGroceries app if they’ve not yet done so.
Switching accounts: If you are already signed in to an account and wish to switch to a different account, go to the Settings screen, choose “Account”, and sign in to the other account. You’ll be asked whether you want to copy your existing lists (the ones in the previous account) into the account you’re signing in to. If you intend to join two accounts, then choose to copy the lists. If you just want to switch to a different account and keep them separate, then choose to not copy the lists.
To remove someone from your account, sign in to the website, go to the “Settings” link in the upper-right, and delete the device from your account. Learn more about using the website.
If you later change your email address, you can update your OurGroceries account to match. Learn more
If you find that your lists are not synchronized despite following the above instructions, email us and we’ll help you out.
Using recipes
The focus of recipes in OurGroceries is on the ingredients, and particularly the ingredients you might need to buy at the store. You typically won’t enter ingredients like water, oil, and salt. Enter the ingredients into the recipe and edit the recipe’s notes to add the cooking instructions, links to the source of the recipe (if it came from a website), and other details. Learn more about notes
When you’ve decided to make a recipe, review the items. Tap the items that you’ll need to buy, and they’ll be added to your shopping list. The first time you do this, OurGroceries will ask you which shopping list each item should be added to. (It won’t ask if you only have one shopping list.) It’ll remember your choice for next time. This is handy if, for example, you buy your bread from the grocery store but the meat from the butcher.
(If you tapped the wrong shopping list, or later change your mind about which shopping list an item should be put on, you can tap the to the right of the item name in the recipe then change the “Target list” there.
If you think you need all or most of the ingredients, you can add all of the ingredients at once to the various shopping lists to which they belong. To do this, tap the “Add recipe to shopping list” button below the recipe.
Another way to add a recipe to a shopping list is to visit the shopping list, tap the button, then type the name of the recipe. You can then tap the recipe’s name and choose which of its items you want to add to this shopping list.
Recipes can have other uses as well. For example, if you buy the same set of things every week, then you can create a “recipe” with these items and add them to your shopping list with one tap. You could also have a recipe of things you need to pack for an airplane trip, add them with one tap to a “Get ready” shopping list, then cross off items as you pack them.
Creating lists and recipes
Here’s how to create a shopping list or recipe:
- On iPhone: Go to the top-level screen (the one that shows all of your shopping lists and recipes) and tap in the lower-right of the screen.
- On Android: Go to the top-level screen (the one that shows all of your shopping lists and recipes) and tap the floating button in the lower-right of the screen. Alternatively, tap to the right of the “Shopping Lists” or “Recipes” headers.
- On the website: Go to the top-level screen (the one that shows all of your shopping lists and recipes) and click the to the right of the “Shopping Lists” or “Recipes” headers. Alternatively, open the menu and choose “Add a Shopping List” or “Add a Recipe”.
Typically shopping lists are named after various stores you shop at, but that’s entirely up to you, and some people create shopping lists for to-do tasks and other shared lists. Lists can also be named after the type of store, such as “Groceries”, “Drugstore”, and “Hardware”.
Deleting lists and recipes
To delete a shopping list or recipe:
- On iPhone: Go to the top-level screen (the one that shows all of your shopping lists and recipes), tap the to the right of the shopping list or recipe you want to delete, then tap “Delete Shopping List” or “Delete Recipe”.
- On Android: Visit the shopping list or recipe itself, tap the menu icon in the upper-right, then tap “Delete list” or “Delete recipe”.
- On the website: Visit the shopping list or recipe itself, click the menu icon in the upper-right, then click “Delete list” or “Delete recipe”.
If you accidentally deleted a shopping list, you can enable the “Add multiple items” setting to make it easier to reconstruct it. Learn more
Renaming lists and recipes
To rename a shopping list or recipe:
- On iPhone: Go to the top-level screen (the one that shows all of your shopping lists and recipes), tap the to the right of the shopping list or recipe you want to rename, enter the new name, then tap “Done”.
- On Android: Visit the shopping list or recipe itself, tap the menu in the upper-right, tap “Rename list” or “Rename recipe”, then enter the new name.
- On the website: Visit the shopping list or recipe itself, click the menu in the upper-right, click “Rename list” or “Rename recipe”, then enter the new name.
Removing ads
The OurGroceries app is free, but we show ads in a few screens in order to help pay for continued development. If these ads bother you, or if you’d like to support development directly, you can upgrade. This does not require you to download another app or lose your lists. Upgrading will also get rid of the ads for everyone you are sharing your lists with.
The price of upgrading depends on the country, but is about US$1 per month for a monthly subscription, US$6 per year for a yearly subscription, and US$20 for a lifetime (one-time) upgrade. Subscriptions start with a 7-day free trial.
Upgrading is done through your device’s app store (the App Store on iPhone, the Play Store on Android), which handles all payment. It also keeps track of the fact that you’ve upgraded, so that you can upgrade again later for free if you get a new phone.
If you’d like to upgrade:
- To upgrade on iPhone, go to the top-level screen of OurGroceries, tap the Settings icon, then tap “Remove Ads”. From this screen you can buy the upgrade. If you had previously bought the upgrade using this App Store account, then you can tap “Restore” to restore your upgrade.
- To upgrade on Android, tap the menu icon in the upper-right, tap “Settings”, tap “Remove Ads”, then tap one of the upgrade buttons.
- There’s no direct way to upgrade the website version of OurGroceries, but if you upgrade the OurGroceries app on any mobile device (iPhone or Android) in your account, the website will be considered upgraded and will no longer show ads.
Advanced features
Categories
If you’d like you can assign items to categories, and they will by grouped by category in the shopping list. For example, if you assign “milk” and “cream” to the “Dairy” category, then both will show up together in the “Dairy” section of your shopping list. This can make shopping easier, since dairy items are often located near each other in the supermarket.
We provide a few categories to get you started, but you’re free to add your own or change the ones that already exist. You can edit the list of categories from the Settings screen of OurGroceries. You can also rearrange categories, so that the sections in the shopping list will be in the order that you visit them in the store. Learn more
By default, OurGroceries guesses what category each new item should be in. It does this for common items in many languages. For example, it knows that “apple” should be in “Produce”. You can instead configure OurGroceries to leave new items uncategorized or ask you which category to put it in. Learn more
To manually put an item in a category, tap the to the right of the item name, then tap the “Category” chooser.
Although the default category names are things like “Dairy” and “Produce”, some people use aisle numbers instead, like “Aisle 1” and “Aisle 2”. Remember, though, that categories are the same across all shopping lists. That means that (for example) “tomato soup” will be in “Aisle 4” for all lists, even though tomato soup may be in different aisles in different stores. Using aisles for categories works best if you do most of your shopping at the same store.
If you’d rather not see your items grouped into categories, you can completely turn the feature off.
Changing item order
By default items are shown alphabetically in your shopping list. You can rearrange them to be in another order, for example to match the order that you visit them in the store. (You can accomplish the same thing using categories. Learn more.)
If you’d like to rearrange items:
- On iPhone: While looking at a shopping list, tap the button at the upper-right and select “Rearrange Items”. Handles will show up at the right of the item names. You can drag items by their handles. When finished, tap the “Done” button at the upper-right of the screen.
- On Android: While looking at a shopping list, open the menu by tapping the menu button in the upper-right. From this menu select “Rearrange items”. Handles will show up at the left of the item names. You can drag items by their handles. When finished, tap “Done” at the top-right of the screen.
- On the website: While looking at a shopping list, move your mouse cursor to hover over the item you’d like to move. A handle will appear at the left of the item. Drag this handle to move the item to another position in the list.
Once you rearrange items, we remember this new order for the next time that you create a shopping list. If you’re using categories, you can also drag items to another category in order to categorize them differently.
List notes
Each shopping list and each recipe can have an attached note. For a shopping list the note might include the store’s address and other generic store information. For a recipe you could store the steps in the recipe and a web link to where you originally found it.
To edit a note:
- On iPhone: While looking at a shopping list or recipe, tap the button at the bottom that looks like a square with a pencil. You can then tap the “Edit” button in the upper-right to edit the note, then “Done” when finished.
- On Android: While looking at a shopping list or recipe, tap the menu button in the upper right, then tap “View list notes” or “View recipe notes”. From there you can edit the note and tap “Save” when done.
- On on website: While looking at a shopping list or recipe, tap the menu button in the upper right, then tap “Edit notes”.
Photos
You can add a photo to each item. This is useful if you want to be sure that your partner gets exactly the item you have in mind.
To add a photo:
- On iPhone: Tap the to the right of the item name, then tap the “Add Photo” button. You’ll then be given a choice of taking a photo with the camera, choosing a photo from your photo album, or pasting a photo from the clipboard.
- On Android: Tap the to the right of the item name, then tap the “Add Photo” button. You’ll then be given a choice of taking a photo with the camera, choosing a photo from your photo album, or pasting a photo from the clipboard.
- On the website: Click the to the right of the item name, click “Add Photo”, then choose a photo from your computer.
To remove a photo from an item, tap the “Remove Photo” button below the photo.
Items that have photos will show a small thumbnail in the shopping list. You can tap that thumbnail to see the full-size version.
Adding items with your camera
You can add an item to your grocery list simply by taking a photo of it. OurGroceries will recognize the item and supply the right name to go with it. This is great for adding detailed items to your list, such as “Astro BioBest Probiotic Yogurt, Lactose Free, Plain” or “Sensodyne Pronamel Active Shield Toothpaste”, ensuring that the right item will get brought home from the store. The photo you took will also be added to the item.
To add an item this way:
- On iPhone: Tap the icon at the bottom of any shopping list. If you see “Scan Barcode” at the top of your camera screen, then tap the icon in the upper-right to switch to the “Add Item by Photo” feature. Center the item in the camera view, make sure it’s in focus, and take the photo.
- On Android: Tap the icon at the top of any shopping list. Center the item in the camera view, make sure it’s in focus, and take the photo.
After a few seconds, you’ll see the name that OurGroceries guessed for the item, as well as similar items you’ve added in the past. Tap any of them to add it to your shopping list. You can also edit the name in the edit box at the top.
Barcode scanning
OurGroceries has a database of 17 million products and their barcodes (UPC). You can scan a barcode using your phone’s camera and OurGroceries will look it up in its database. If it’s found, the item’s name will be added to your shopping list.
To scan a barcode:
- On iPhone: Go to the shopping list to which you’d like to add the item and tap the icon at the bottom of the screen. This will bring up either the “Add Item by Photo” or “Scan Barcode” screen, whichever was used last. If “Add Item by Photo” comes up, tap the icon to enter barcode mode. When the “Scan Barcode” screen activates, aim your device’s camera at the product’s barcode. Make sure that the barcode is in focus and not too far or too close to the camera.
- On Android: Go to the shopping list to which you’d like to add the item, tap the icon at the top of the screen, and aim your device’s camera at the product’s barcode. Make sure that the barcode is in focus and not too far or too close to the camera.
If our database knows about the product, its name will be added to your list. (On Android, the name of the product will also be read aloud. You can disable this in the “Settings” screen. Learn more.)
If the barcode is not in our database, you will see a message telling you that the barcode is unknown and giving you the option to add the item manually. If you tap “Add Manually”, you will be taken to the normal screen where you can type a new item’s name or choose one from the existing list. Once you type or select an item, it will be added to your shopping list and the scanned barcode will be associated with it. The next time you scan that barcode, that item will be added to your list directly. It won’t be looked up in our database.
If you’d like to remove a barcode from an item in your shopping list, tap the to the right of the item and tap the icon to the right of the barcode.
To associate a barcode with an existing item, tap the to the right of the item and tap the icon. You’ll be able to scan a barcode with your camera as described above and the barcode will be associated with that item. The next time you scan that barcode, that item will be added to your list directly. It won’t be looked up in our database.
Printing
To print a shopping list or recipe:
- On iPhone: While looking at a shopping list or recipe, tap the “Share” icon in the lower-left, which looks like a square with an arrow sticking out the top; then tap “Print list” or “Print recipe”.
- On Android: While looking at a shopping list or recipe, tap the menu button in the upper right; then tap “Print list” or “Print recipe”.
- On the website: While looking at a shopping list or recipe, click the menu button in the upper right; then click “Print list” or “Print recipe”. You can also just print the page directly (Ctrl-P on Windows, Command-P on Mac). The printed version will be paper-friendly (it won’t have the buttons or the website header).
Android shortcuts
Shortcuts are icons on your home screen that go directly to certain lists within the OurGroceries app. You could have multiple shortcuts, one for each store that you visit frequently. A shortcut can also go straight to the “Add an item” screen, to scanning a barcode, or to adding an item by voice.
On Android 7.1 and later, to create a shortcut, long-tap the OurGroceries icon on your home screen. A short menu of recently-used lists will pop up. Drag one to your home screen to pin it there. If the icon looks like this, then it will jump to the shopping list or recipe directly:

If the icon looks like this, then it will jump to the “Add an item” screen for the shopping list or recipe:

If the icon looks like this, then it will jump to scanning a barcode for the shopping list or recipe:

If the icon looks like this, then it will jump to adding an item by voice for the shopping list or recipe:

If the icon you want isn’t listed, then launch the OurGroceries app, perform the action you want (e.g., scanning a barcode or adding an item by voice) in the shopping list you want, then return to the home screen icon’s pop-up menu.
To delete a shortcut, long-tap it and drag it to the “Remove” label at the top of the home screen.
iOS Shortcuts
This section describes iOS Shortcuts. See Android shortcuts for the similar Android feature.
To use this feature, launch the iOS “Shortcuts” app on your iPhone or iPad device. You must have already installed the OurGroceries app on your device.
You can use custom Shortcuts to add an item to a shopping list, view a shopping list, or to open the add item or barcode scanning screens within the OurGroceries app.
To create a shortcut, launch the iOS “Shortcuts” app:
Tap the button in the upper right-hand corner, then find and tap “OurGroceries”. You can now choose one of the OurGroceries shortcut actions to add to your shortcut.
Each of the OurGroceries shortcut actions has a shopping list field which can either be set to a specific list or left blank if you want to choose a list each time you run the shortcut. The “Add Item to List” shortcut action also has an item field which, again, can either be set to a specific item or left blank if you want to choose an item each time you run the shortcut.
Shortcuts can be given a memorable name at the top of the shortcut details screen. For example, you might name your shortcut “Add to Grocery List”.
You can run a shortcut directly from the Home Screen: tap the share button on the shortcut’s details screen and tap “Add to Home Screen”. You can also run a shortcut by saying “Hey Siri”, then the name of the shortcut. Shortcuts can also be found by name in Search, which can be accessed by swiping down on the Home Screen or swiping left on the Lock Screen.
You can read more about iOS Shortcuts at Apple’s Shortcuts User Guide.
iOS Home Screen quick actions
Home Screen quick actions are a convenient way to add items to your most often used shopping lists right from the Home Screen. You open the quick actions menu by touching and holding the OurGroceries app icon. (On an iPhone with 3D Touch, you can press briefly but firmly on the icon to see the menu.)
Widgets
Widgets give you the ability to see and interact with your shopping lists right on your iPhone or Android home screen, or on your iPhone lock screen.
-
On iPhone, a widget can show a single shopping list or show the names and item counts for multiple shopping lists, and for larger widgets you can tap a button to add or scan an item to a shopping list.
To create a widget on the Home Screen or Today View, touch and hold an empty area of the screen, tap the button in the top left-hand corner, then scroll down to find and tap “OurGroceries” (or type “OurGroceries” into the search bar at the top). You can then add a specific type and size of widget from the gallery by swiping left and right, then tapping the green “Add Widget” button at the bottom of the screen.
To configure a Home Screen or Today View “Shopping List Items” widget, touch and hold the widget and tap “Edit Widget” (or “Edit OurGroceries” if the widget is part of a widget stack). You can then choose a specific list to show on the widget.
To create a widget on the Lock Screen, touch and hold the Lock Screen until the “Customize” button appears, then tap “Customize”. Select “Lock Screen”, then tap the widget area below the time, and then scroll down to find and tap “OurGroceries”. You can then add a specific type and size of widget from the gallery by swiping left and right, then tapping the widget or dragging it onto the widget area. “Shopping List Items” widgets can be configured by tapping the widget in the widget area before exiting Lock Screen customization.
You can learn more about adding and editing iPhone widgets on Apple’s Widget support page.
-
On Android, a widget can show a shopping list, and you can tap items to cross them off and tap the to add a new item to a list.
To create a widget, long-tap your home screen, choose “Widgets”, and scroll down to find “OurGroceries”. Long-tap the widget and drag it wherever you’d like on your home screen. If you have multiple shopping lists, you’ll be asked which one you want to show. You can long-tap the widget to change its size. Tap items to cross them off, tap the name of the list in the header to jump straight to the list, and tap at the top to add an item. To delete a widget, long-tap it and drag it to the “Remove” label at the top of the home screen.
Website
You can see and edit your lists on the OurGroceries website. To sign in, click the Sign In button at the top of this page. Enter the same email address and password that you use to share lists amongst family members with the mobile app.
If you’ve forgotten your password, click the “Reset Password” button. We will email you a link that you can use to choose a new password.
Once you’ve signed in, you can see your lists and edit them much like you can in the mobile app.
The “Settings” link in the upper-right lets you manage your account:
- You can change the email address you use for your OurGroceries account by entering your existing password and your new email address.
- You can change your password by entering your existing password and your new password (twice).
- You can change various settings that affect how the website works. These mirror the same settings in the mobile app. See the specific section for each setting in this user guide.
- You can export all of your data. Learn more
- You can delete your OurGroceries account. Note that this is permanent and cannot be undone. Any device signed in to your account will lose their lists.
- At the bottom of the page is a list of all the devices that are signed in to your account. You can click the next to a device to sign it out from your account. This will create a new empty account for that device and copy all of your lists to that account. Any changes made to the lists on that device will stay on that device and no longer affect yours.
Amazon Alexa
If you own an Amazon Echo, or any Alexa-enabled device, you can ask it to add items to your OurGroceries shopping lists using your voice. To make this possible, follow these steps:
- You’ll need your OurGroceries master email address and password. If you don’t have an account, create one first.
- Launch the Amazon Alexa app on your phone, tap the three-line menu button in the upper left, choose “Alexa+ Store”, tap the gear icon in the upper-right, choose “Original Alexa Skills”, tap “Discover More Skills”, then search for “OurGroceries”. Tap the “Enable” button to enable the skill.
- The Alexa app will ask for your OurGroceries master email address and password. This information will go straight to OurGroceries. Alexa will not know your password, and your information will be transmitted securely to us. Enter the information from step 1 and tap “Sign In”.
You can then speak phrases like:
- “Alexa, ask OurGroceries to add milk.”
- “Alexa, tell OurGroceries to add olive oil to Walmart.”
- “Alexa, ask OurGroceries what are my lists.”
- “Alexa, ask OurGroceries what is on the groceries list.”
- “Alexa, ask OurGroceries if milk is on Safeway list.”
- “Alexa, tell OurGroceries to remove milk from groceries.”
If there’s a shopping list you use the most, you can make it your default list:
- “Alexa, tell OurGroceries to set my default list to Safeway.”
- “Alexa, ask OurGroceries what is my default list.”
You can then omit the list name if you’re changing that list:
- “Alexa, ask OurGroceries to add milk.”
- “Alexa, tell OurGroceries to remove milk.”
- “Alexa, ask OurGroceries to increase carrots.”
You can add multiple items at once:
- “Alexa, ask OurGroceries to add these items.”
- “... Okay, what’s the first item to add to Safeway?”
- “Bread.”
- “... Added bread to Safeway. What else?”
- “Butter.”
- “... Added butter to Safeway. What else?”
- “That’s it.”
- “... Added two items to Safeway.”
If you’re having trouble adding items to OurGroceries using Alexa, then see this answer.
To remove your Alexa device from your OurGroceries account, visit your Settings page on our website, scroll down to find the list of devices on your account, find the one called “Amazon Alexa”, and click the to the right of it.
Voice commands on Android and Wear OS
You can add items to your shopping lists using voice commands on your Android phone and Wear OS watch. No additional setup is needed to enable this capability, although you must already have installed the OurGroceries app on your phone (and watch, if desired).
You can then say things like:
- “Hey Google, ask OurGroceries to add milk.”
- “Hey Google, ask OurGroceries to add milk to Costco.”
- “Hey Google, add milk to OurGroceries.”
- “Hey Google, add milk to Costco on OurGroceries.”
If you don’t specify a shopping list, OurGroceries will add items to your default shopping list, which you can set in your Settings page (on our website) in the “Voice settings” section. If you’ve not set a default list, you will be asked which list to add the item to.
It used to be possible to add items to OurGroceries lists using Google Home and Nest devices, but on June 13, 2023 Google ended the ability for OurGroceries (and all other apps) to do this. Learn more
Siri
You can add items to your shopping lists using Siri on your iPhone, iPod, iPad, Apple Watch, and HomePod. You must already have installed the OurGroceries app on your device.
Siri can add an item to your main shopping list, and will choose a default list if it’s not set, using these voice commands:
- “Hey Siri, add to OurGroceries.”
- “Hey Siri, add with OurGroceries.”
Siri works differently on different devices, depending on which apps are installed and as new Siri features are added. Over time, Siri will adapt to your activity. If Siri is not working with OurGroceries then you can try this voice command to help Siri learn that you want to use the OurGroceries app:
- “Hey Siri, open OurGroceries.”
You can also specify the item to be added, and the shopping list to add it to, in the Siri voice command like this:
- “Hey Siri, add milk with OurGroceries.”
- “Hey Siri, add milk to Safeway with OurGroceries.”
If you don’t specify a shopping list then OurGroceries will add the item to your default shopping list, which you can change in the Settings page on our website in the “Voice settings” section.
You can use Siri voice commands from the lock screen of your phone. On the Apple Watch you must first install the OurGroceries watch app and complete the setup process. See instructions here.
These Siri commands can also be used with a HomePod that’s connected to your phone. If this doesn’t work for you, be sure to turn on “Personal Requests” on the HomePod’s settings.
Apple Watch
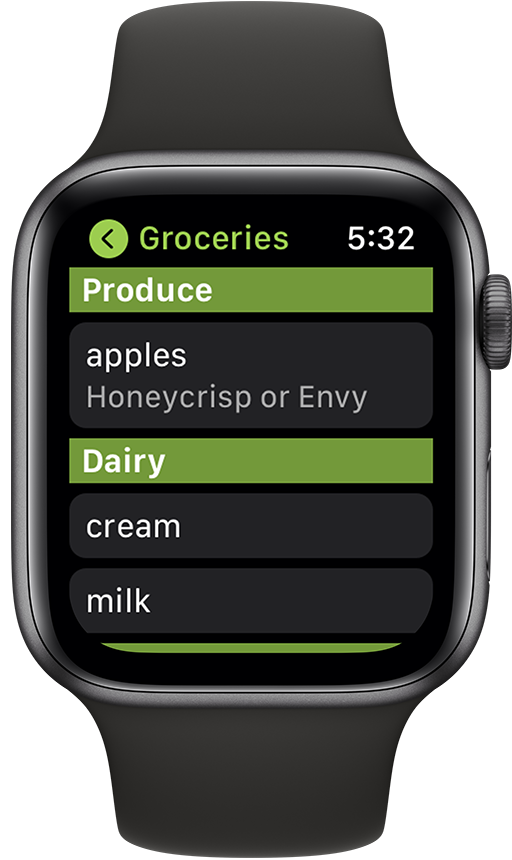
You can see your lists on your Apple Watch. If you have configured your phone to install all Apple Watch apps automatically, then it will show up on your watch’s home screen. If not, you should run the Watch app on your iPhone and install the OurGroceries watch app.
The first time you run the Apple Watch OurGroceries app, it will ask you to open the OurGroceries app on your iPhone. (See here if this step doesn’t work.) After this first time, running the OurGroceries app on your iPhone will not be necessary.
Your shopping lists will appear on your watch, and you’ll be able to cross items off and add items using your voice. If the watch has a connection to the Internet (either directly or through your iPhone), it will keep your lists in sync with all the other devices signed in to your OurGroceries account.
To add an item to your list, tap the “Add an item...” row. You can pick one of the suggested items, type or write an item name on your watch, or use the dictation feature to say the item’s name using your voice.
If your shopping list is very long, only the first few dozen items will be shown. Tap the “Show all items...” row to display the rest of the list.
You can add an OurGroceries complication to your watch face for quick access to your lists. Also, watch faces with large rectangular complications and widgets in the Smart Stack can show the number of items on your shopping lists, or the items on a specific shopping list.
To add an OurGroceries widget to your Smart Stack, swipe up on the watch face, then press and hold the screen until the button appears. Tap the button, then scroll down to OurGroceries to see the available widgets.
If you would like the Watch screen to stay on longer while shopping, then make the following changes, either from the Settings app on the watch itself, or from the Watch app on the phone:
- Under General → Return to Clock, adjust “Return to Clock” to at least “After 2 minutes”. You may instead choose to change this setting only for the OurGroceries app by scrolling down to OurGroceries, adjusting “Return to Clock” to “Custom” and choosing at least “After 2 minutes”.
- Under Display & Brightness → Wake Duration, adjust “On tap” to “Wake for 70 Seconds”.
If your Apple Watch is an older model, try these steps instead:
- Under General → Wake Screen, adjust “On tap” to “Wake for 70 Seconds”.
- Under General → Wake Screen, adjust “Return to Clock” to at least “After 2 minutes”. If that setting is missing, try adjusting “On screen wake show last app” to at least “Within 2 Minutes of Last Use”.
Wear OS
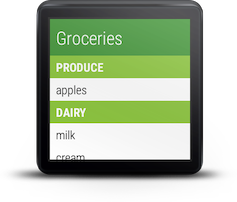
You can see your lists on your Wear OS watch. If you have a Wear OS device and the OurGroceries app installed on its paired phone, follow these steps to install the OurGroceries app on the watch:
- Click this link to visit the Play Store listing for the OurGroceries app.
- Click the “Install” button.
- In the pop-up, choose your watch from the device list.
- Click the “Install” button.
On your watch, launch the OurGroceries app to see your lists. You can tap items to cross them off and tap “Add an item...” to add an item by voice.
To check if OurGroceries on your phone is connected to your watch, go to the “About” screen in the phone app’s Settings. At the bottom it should tell you that a Wear OS watch is connected. Learn more about the “About” screen
If you find that the app returns to the watch face too quickly, launch the watch’s Settings and find the Display options. Look for a setting called “Show last app” (on Samsung watches) or “Go to watch face” (on Google Pixel watches) and choose a longer length of time.
Mac Apple Silicon app
Mac computers with an Apple Silicon CPU running macOS 12 or later can install our app from the Apple App Store. You appear to be running such a computer.
Importing data
You can import data into an OurGroceries shopping list or recipe. To do this, sign in to the OurGroceries website, click the list or recipe, click the menu button in the upper-right, then click “Import items”. Learn more about the website
A window will pop up. You have two options. One is to type (or paste) a list of items into the large box at the top. Each item must be on its own line. For example:
    milk
    potatoes (3)
    chicken
Each item will be added to your list or recipe as if you had added it individually.
Instead of typing the list manually, you can upload a file from your computer. To do this, click the “Choose File” button and find the file you’d like to upload. The file should follow the same guidelines just described—a plain text file with one item per line.
If you want to specify other information about each item (its category, barcode, or note), upload a CSV file instead. (“CSV” stands for Comma-Separate Values. It’s a popular file format for exchanging spreadsheet-like documents.) The CSV file must have a header row (its first line) that describes the fields. A header of “item”, “name”, or “description” will indicate that this column is the item’s name. A header of “category” will indicate that the column is the category (such as “Dairy”). A header of “barcode” or “upc” will indicate a barcode (with or without hyphens). And a header of “note” or “notes” will indicate a note for the item.
For example:
    item,category
    milk,Dairy
    bread,Bakery
You can get started by downloading our CSV template. It includes two columns (item and category). Open it using a spreadsheet program like Excel, edit it, save it as a CSV file again, and import it back into OurGroceries. Be sure to not delete the first header row.
You’ll be shown a preview of the items to be imported at the bottom of the window. Double-check that these are right before clicking the “Import” button. This is especially important when importing a CSV file. If the header is not recognized, each row will be imported as the item name, resulting in items with names like “milk,Dairy”. If the header is recognized, you’ll see multiple columns.
If you use the Out of Milk app, you can export your lists from the “List Summary, Import and Export” link of their website and import those CSV files into OurGroceries as described above.
Exporting data
You can export all of your data. This includes your shopping lists, recipes, the master list of all the items you’ve ever added, and the list of categories.
To export your data, visit the OurGroceries website, sign in, click the “Settings” link at the upper-right of the page, and find the “Export Data” button. Learn more about the website
The data is downloaded as a ZIP file that contains a README.txt file that explains the contents of the ZIP file, the data in Microsoft Excel format (XLSX), and the data in JSON format.
AI integration (MCP server)
If you use AI agents, such as Claude or ChatGPT, you can link your OurGroceries account to these agents. This allows the agent to know about your shopping lists and recipes. Once you’ve linked your accounts, here are some things you can ask your agent:
- “What are my shopping lists?”
- “Is milk on my Costco list? If not, please add a gallon of it.”
- “Please add my Greek Salad recipe ingredients to my Safeway list, except the dressing, which I already have.”
- “Move all meat items from my Kroger list to the butcher list.”
- “Find a nice recipe online for guacamole and puts its ingredients into a new OurGroceries recipe. Omit items I’ll always have, like salt and pepper.”
- “Go through my Walmart list, categorize every item, and add appropriate photos from online.”
- “Add my lasagna recipe to my Sainsbury’s list, but double it and convert the units to metric.”
To link your accounts, first be sure to already have an OurGroceries account.
Then, for Claude:
- Visit the Claude AI website. Create a Claude account or sign in if necessary.
- On the left, click the “Customize” icon.
- Click the “Connectors” tab.
- Click the “+” at the top of the list of connectors.
- Click “Add custom connector”.
- Name: OurGroceries
- URL: https://www.ourgroceries.com/mcp
- Leave “Advanced settings” empty.
- Click “Add”.
- You should be shown the OurGroceries sign-in screen. Sign in to your OurGroceries account.
For ChatGPT:
- Visit the ChatGPT website. Create a ChatGPT account or sign in if necessary.
- Click your name in the lower-left corner.
- Click “Settings”.
- Click “Apps”.
- Click “Create app”. (You may need to go into developer mode under
“Advanced settings”.)
- Name: OurGroceries
- URL: https://www.ourgroceries.com/mcp
- Authentication: OAuth
- Check the “I understand and want to continue” checkbox.
- Click “Create”.
- You should be shown the OurGroceries sign-in screen. Sign in to your OurGroceries account.
This feature is highly experimental! We’re excited about it and would love to hear from you about how it’s working for you, what you’re using it for, and what other capabilities you’d like it to have.
Settings
Everyone does their grocery shopping differently, and the Settings screen lets you configure OurGroceries to match the way you shop. To reach the Settings screen:
- On iPhone: If you’re looking at a shopping list or recipe, tap the back (left-facing arrow) button in the upper-left to reach the top-level list-of-lists. From there, tap the gears button in the lower-right of the screen.
- On Android: From any screen, tap the menu button in the upper-right, and select the last option, “Settings”.
- On the website: Once signed in, click the “Settings” link in the upper-right of the page.
The rest of this user guide describes all of the available settings.
Remove ads
The “Remove Ads” screen in the mobile app’s “Settings” screen can be used to upgrade OurGroceries and turn off the ads. Upgrading will also get rid of the ads for everyone you are sharing your lists with. Learn more about upgrading
There’s no equivalent screen on the website because ads on the website will automatically be turned off if any mobile app in the account has upgraded.
About OurGroceries
The “About” screen in “Settings” (available on the iPhone and Android version of OurGroceries, but not on the website) shows the OurGroceries app version number and convenient buttons for getting help and rating the app.
The screen also tells you how long it has been since the app was able to reach our server. The app uses our server to back up your data and to pass your changes on to other devices in your household. If your device can’t reach our server, then your changes won’t be visible to others, and others’ changes won’t be visible to you.
The app tries to contact the server every 20 seconds when the app is open on your phone. The “About” screen should say something like, “Last connection to the OurGroceries server was 7 seconds ago.” If the time is longer than 20 seconds, or if it says, “There has not been a connection to the OurGroceries server since this app was launched,” then you should check your Internet connection. Perhaps you are off-line, or you asked your device to not permit OurGroceries to contact the Internet. Check the phone’s own Settings app.
Sign in / Switch accounts
The “Sign in” or “Account” screen in “Settings” is used to set up sharing of lists with others. Here you enter the email address you’d like to use for your OurGroceries account. This is also a good screen to verify that you’re using the email address you expect, and that sharing has been set up properly. The screen will give you detailed instructions about how to proceed. Learn more about list sharing.
Note that this screen is not available on the website, because just signing in to the website establishes which OurGroceries account you want to use.
Item categories
The “Item Categories” screen in “Settings” lets you edit and rearrange the item categories.
- On iPhone: To add a category, scroll down to the bottom of the list and tap “Add a category...” To rename a category, tap its name. To delete a category, tap the at the left of the row. To rearrange a category, drag it by the bars at the right of the row.
- On Android: To add a category, tap the floating button in the lower-right corner. To rename or delete a category, tap the at the right of the row. To rearrange categories, tap the double arrows at the top-right of the screen, drag rows by their bars, then tap “Done” the top-right.
- On the website: To reach this screen, visit any shopping list, click the menu in the upper-right, then choose “Manage Categories”. To add a category, scroll down to the bottom of the list and click “Add a category...” To rename or delete a category, click its name. To rearrange a category, hover over the row with your mouse and drag it by the bars that appear at the left.
Sort list of lists
The “Sort list of lists” options in “Settings” let you control the order OurGroceries shows shopping lists in the top-level screen. The default is to list them alphabetically. This option lets you instead put all shopping lists with items at the top, and empty lists at the bottom. (Within these two groups they will be listed alphabetically.) This makes it easier to find lists that have items that need to be purchased.
Lock orientation to vertical
While shopping it can be frustrating to hold the phone and have the screen orientation switch between vertical and horizontal whenever the phone is tilted. This option lets you lock the screen orientation to vertical (portrait).
- On Android: This option is not available on tablets.
- This setting is not available on the website.
Themes
The “Themes” option in “Settings” lets you set the look of OurGroceries. There are two basic themes (Light and Dark) and 20 additional colorful themes.
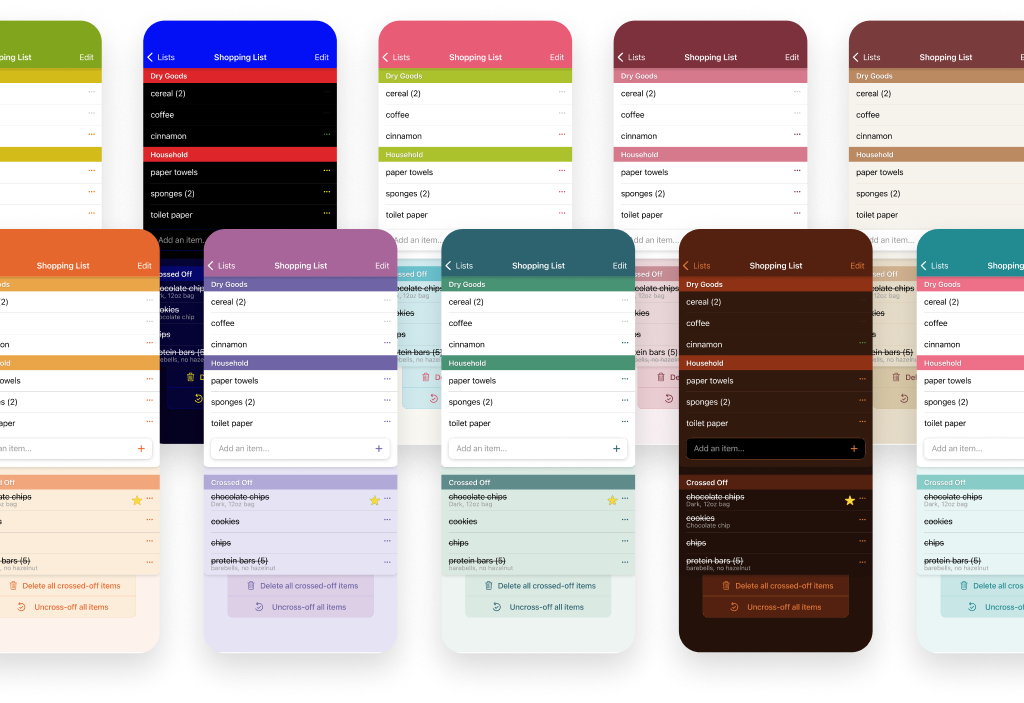
You can also choose the “System Default” theme, which will choose the Light or Dark theme based on your phone’s appearance.
Sort shopping list items
The “Sort shopping list items” option in “Settings” gives you some control over the order that OurGroceries lists items in shopping lists.
By default, new items added to shopping lists are shown in alphabetical order. You can rearrange items in whatever order you’d like them to be. Learn more about changing item order.
Once items have been rearranged, however, they stay in that fixed order. This can cause some unexpected behavior. For example, let’s say that you add items “bacon”, “cream”, and “dates” to your list. You then rearrange the items to put “cream” first, then rearrange them again to put “cream” back between the other two items. This order will now be fixed. It happens to be alphabetical, but that, to OurGroceries, is just a coincidence.
If you then add “apple” to your list, OurGroceries doesn’t know that the most natural place is at the beginning. So it puts it at the end. In fact all new items will show up at the end, alphabetized. You will end up with two parts to your list: the first that has a fixed order, and a second that’s alphabetized.
Fixing the item order this way may not be what you had intended. You may have used drag-and-drop not to reorder items, but to put them into different categories. When this happens, you can use this setting to force OurGroceries to always show items in alphabetical order. Note that when you enable this setting, drag-and-drop will still work, but you will only be able to use it to move items to different categories.
If you want OurGroceries to permanently forget all the drag-and-drop sort orders that you’ve done, then sign in to the website, click the menu button, select “Manage Master List”, select the menu button in the master list page, and select “Forget Drag-and-Drop Order”. This will return all of your lists to their natural (alphabetical) order. This action cannot be undone, so be careful if you have lists that have a particular order that you’ve created and want to keep.
Arrange, sort, and group crossed-off items
You can control the order of crossed-off items in shopping lists. There are five options:
- “Alphabetically” lists crossed-off items in alphabetical order. This is useful if you use your list of crossed-off items as your source of items to add to your shopping list.
- “Recently crossed-off at bottom” puts items that were recently crossed off at the bottom of the list.
- “Recently crossed-off at top” puts items that were recently crossed off at the top of the list of crossed-off items. This is the default option for this setting. The main benefit of this option is to be able to quickly find an item that was accidentally crossed off. It’ll be at the top, where you can tap it again to uncross it off.
- “Common items first” puts your most frequently-used items at the top of the list. This is like the “Common items first” way of sorting the master list.
- “By drag and drop” puts items in the same order as they are in the active section on top, which is typically alphabetical, unless you’ve dragged items around, in which case they will be listed in your custom order.
You can also control the grouping of crossed-off items in shopping lists. There are two options:
- “All items together” shows all crossed-off items together in one section.
- “Group into categories” groups crossed-off items by their categories. This is useful if you use the crossed-off section to find items to put back into the active section at the top, and want to browse them by category.
Cross-off action
The “Cross-off action” option in “Settings” lets you choose what action you need to take to cross an item off your shopping list. By default this is a simple tap. If you find that you too easily cross items off accidentally while shopping, then you can use this option to require an action that’s less likely to be performed accidentally.
- On iPhone: You can choose between “Press and Hold”, which means holding your finger on the item for a full second, or “Swipe”, which means swiping your finger horizontally across the item in either direction (left to right or right to left). On devices with 3D Touch, a fourth option is “Press Firmly”, which means pressing the row a little more firmly than a regular tap.
- On Android: You can choose between “Press and Hold”, which means holding your finger on the item for half a second, or “Swipe”, which means swiping your finger horizontally across the item in either direction.
- This setting is not available on the website.
Show keyboard
The “Show keyboard” option in “Settings” lets you control whether the on-screen keyboard is shown automatically after tapping to add an item to your shopping list. By default this option is enabled. You may wish to disable it if you rarely type items but instead prefer to choose them from your master list.
If you’ve disabled this option, you can force the keyboard to be shown by tapping the item name box at the top of the “Add an item” screen.
Arrange, sort, and group master list
The master list is the list of all the items you’ve ever added to any list in OurGroceries. It’s the list you see when you tap to add an item to your shopping list. This option lets you control the order and grouping of these items in the “Add an item” screen.
By default, the master list is ordered so that the most frequently-added items are at the top of your list. This makes it easy to add these items next time you make a list. You might prefer, though, to order the list alphabetically, especially if you don’t like to tap the first few letters of the item name.
Also by default, the master list is shown as one single big list. You might prefer to show them grouped by category, so that, for example, all “Dairy” items show up together. This makes it easier to browse the master list, looking for items that you might need to get.
Note that if you group by category but sort by common items first, then each category will show its own common items at the top.
Add multiple items
The “Add multiple items” option in “Settings” lets you choose to be able to add more than one item at a time to your shopping list. By default, when adding an item from the “Add an item” screen, tapping an item both adds it to your list and closes that screen, returning you to your shopping list. With this option enabled, the screen will not close. You’ll be able to tap other items.
This option, combined with the grouping of the master list into categories, makes it particularly easy to browse your master list and add the items that you’re running low on. Learn more about master list grouping
Say scanned items
After scanning an item’s barcode, the item’s name is spoken aloud, to make it easier to use the app without looking at the screen. You can use this option to turn off the speaking. Learn more about barcode scanning
When adding an item with no category
When you add a new item to your OurGroceries list, this setting affects what category the item is put in. Learn more about categories
This setting has three options:
- Pick a category for me: The system will pick an appropriate category for the item. If you add the item “apple”, we will guess the category “Produce”. The setting is language-sensitive, so the category you get will depend on how you’ve configured your device’s language. If the app can’t guess a category, it asks you.
- Ask me which category it belongs to: The app will show you a list of your categories, and you can choose one for this item.
- Leave it uncategorized: The new item will remain in the “Uncategorized” category, where you can manually set its category if you wish.
Capitalize items
The “Capitalize items” option in “Settings” lets you choose how newly typed-in items should be capitalized. There are three options: “Don’t capitalize”, “Capitalize the first word”, and “Capitalize every word”. The default is “Don’t capitalize”.
Show other suggestions
The “Show other suggestions” option in “Settings” lets you choose whether OurGroceries should show additional suggested items below yours in the “Add an item” screen. When this setting is turned off, you’ll only see items that you’ve entered in the past. When it’s turned on, you’ll also see other items that might be useful, so that you don’t have to type them in yourself.
Extend screen timeout
The “Extend screen timeout” option in “Settings” lets you extend the normal short screen timeout. This option is turned on by default. With the option off, the screen will turn off by itself after a short period, normally within about one minute. This is fine for normal phone use, but at the grocery store it can be annoying to turn the screen back on between each item.
When this option is enabled on Android (and always on iPhone), the timeout is extended to five minutes while using the OurGroceries app.
List row size
The “List row size” option in “Settings” lets you set the size of the font and row for items. The default is “Normal”. Set it to “Small” to fit more items on the screen, or to “Large” to see the items more clearly.